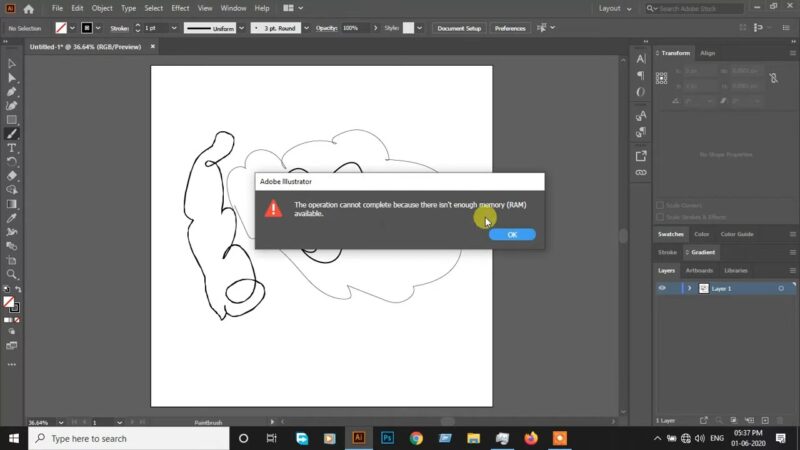
Hey there! If you’ve ever been knee-deep in a creative project, only to be rudely interrupted by the dreaded “Adobe Out of Memory” error, you know how frustrating it can be.
As a fellow creative, I’ve been there too. More times than I care to count, actually. But, I’ve got good news for you!
I’ve tested and tweaked various methods to kick this error to the curb. In this article, I’ll share the best solutions that have worked for me.
1. Increase Your Memory Allocation & Keep Your Software Updated
Have you ever noticed your Adobe program slowing down or crashing mid-project? It’s not just frustrating; it halts your creative process.
After facing similar issues, I discovered two crucial fixes: adjusting memory allocation and keeping the software updated.
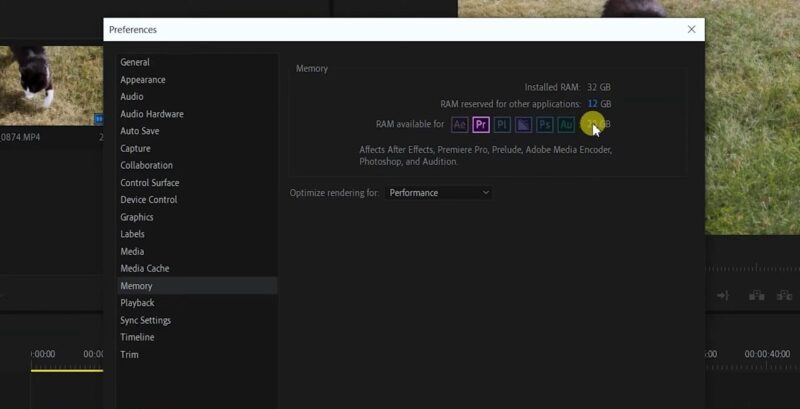
Memory Allocation – The Game Changer
By default, Adobe software doesn’t use all available memory, which can lead to the “Out of Memory” error. The fix is simple yet effective. Here’s how I did it:
- Open Adobe and navigate to ‘Edit’ > ‘Preferences’ > ‘Performance’ on Windows or ‘Adobe [Program Name]’ > ‘Preferences’ > ‘Performance’ on Mac.
- In the ‘Memory Usage’ section, you’ll see a slider. I recommend sliding it to utilize 70-75% of your available RAM. This tweak significantly improves performance without overwhelming your system.
Why Software Updates are Crucial?
Outdated software is like driving a car that’s long overdue for a service. It’s not just about new features; updates often patch up memory leaks and bugs that cause these errors.
Here’s the update process:
- Go to the ‘Help’ menu and select ‘Updates’, or use the Adobe Creative Cloud app.
- Make sure your internet connection is stable to avoid update errors.
When I combined updating Adobe software with adjusting the memory allocation, the difference was like night and day. My programs ran smoother, and the memory errors became a thing of the past. Remember, software maintenance is not just about keeping things up-to-date; it’s also about optimizing what you have.
By ensuring your Adobe applications are using enough memory and are up-to-date, you’re setting yourself up for a seamless creative experience.
2. Clear Your Disk Cache & Optimize Your Computer’s Performance
The ‘Adobe Out of Memory’ error often stems from two core issues: a bloated disk cache and an overburdened computer system. I’ve found that addressing both can significantly enhance Adobe’s performance.
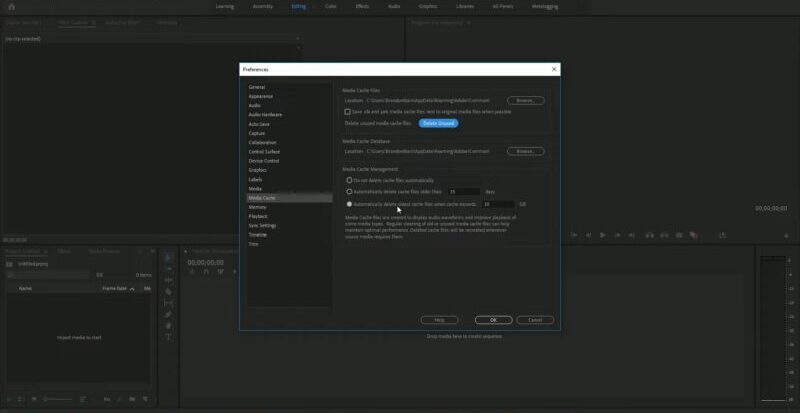
Clear the Disk Cache
Adobe applications store temporary files in a disk cache. Over time, this cache can grow excessively large, causing memory issues. Here’s what I did:
- For After Effects, I went to ‘Edit’ > ‘Purge’ > ‘All Memory & Disk Cache’. This step instantly freed up a significant amount of space.
- In other Adobe apps, similar options are available in the ‘Preferences’ menu.
Clearing the disk cache is like cleaning out a closet full of old, unused items. It not only frees up space but also helps the application run more smoothly.
Optimize Your PC
A cluttered and strained computer can exacerbate memory issues in Adobe. Here’s how I optimized my system:
- Close Unnecessary Programs: Running multiple programs simultaneously can hog your system’s resources. Close any program you’re not using.
- Disk Cleanup: Regularly running a disk cleanup removes temporary files and other unnecessary data, freeing up space and resources.
- Defragment Your Hard Drive: Especially important for HDD users. Defragmenting organizes data more efficiently, improving access speed and overall performance.
Once I cleared the disk cache and optimized my computer, Adobe’s performance improved dramatically. The frequency of ‘Out of Memory’ errors reduced significantly. It’s important to remember that these are not one-time fixes but ongoing maintenance tasks.
Regularly clearing the cache and keeping your system optimized are key practices for any Adobe user looking to avoid frustrating interruptions in their workflow.
3. Expand the Physical Memory
Sometimes, software tweaks aren’t enough. That’s when I looked into hardware solutions and project management strategies.
Upgrading your computer’s RAM can provide a significant boost to Adobe’s performance.
- Assess Your Current RAM: First, check how much RAM you currently have. Adobe applications, especially programs like After Effects, are known for their high memory usage.
- Choose the Right RAM: Ensure the RAM is compatible with your motherboard. More RAM means more space for Adobe to work efficiently.
- Installation: If you’re not comfortable installing RAM yourself, seek professional help. It’s a straightforward process but requires careful handling.
Upgrading my RAM was a game-changer. It’s a cost-effective way to enhance not just Adobe’s performance but your entire computer’s efficiency.
Manage Projects Effectively
How you manage your Adobe projects can also impact memory usage.
- Close Unused Projects: Keeping multiple projects open can eat up memory. Work on one project at a time if possible.
- Use Proxies and Lower Resolution: For video editing, using proxies or working in a lower resolution during the editing process can save memory.
- Regular Saves and Backups: Frequent saving and backing up projects prevent loss of data, especially in the event of a crash.
By upgrading my RAM and managing my projects more efficiently, I noticed a substantial decrease in memory-related errors. It’s not just about throwing more hardware at the problem; it’s also about being smarter in how you manage your work.
These combined steps helped me maintain a smooth workflow, and I could focus more on creativity and less on troubleshooting.
4. Adjust Adobe Project Settings & Use the External Storage
Adjusting project settings within Adobe and using external storage solutions can be effective in managing the ‘Out of Memory’ error. Customizing project settings can greatly reduce memory usage. Here’s how I approached it:
- Reduce Resolution: In programs like After Effects or Premiere Pro, working at a lower preview resolution can save memory.
- Limit Undo Levels: Most Adobe applications allow you to set the number of undo levels. Reducing this can free up memory.
- Disable Multiframe Rendering: While this feature can speed up rendering, it also consumes more memory. Disabling it can help in tight memory situations.
How Can External Storage Help?
Using external storage devices can alleviate the strain on your computer’s internal memory.
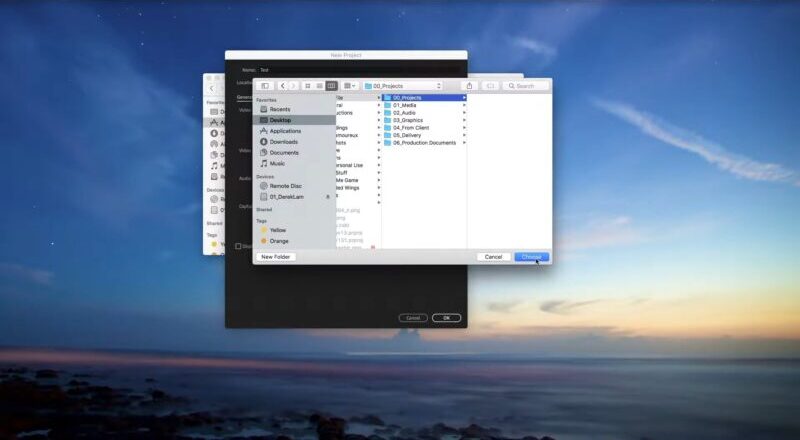
- Store Project Files on External Drives: Moving large project files to an external drive frees up your computer’s internal storage, reducing the likelihood of memory errors.
- Use SSDs for Faster Access: Solid State Drives (SSDs) offer faster data access speeds compared to traditional HDDs, which can improve the performance of Adobe applications.
5. Regularly Update the Operating System
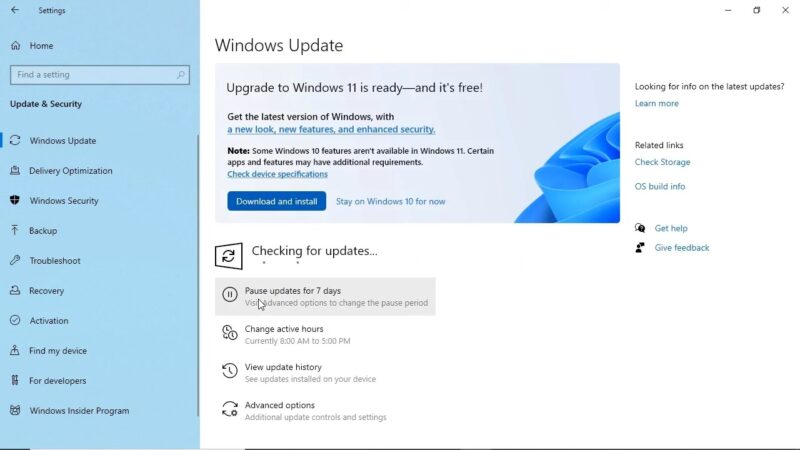
Keeping your computer’s operating system updated and using efficient file formats in Adobe can play a significant role in resolving memory issues. An outdated operating system can lead to compatibility issues and memory errors in Adobe applications.
- Regularly Check for Updates: Whether you’re using Windows or macOS, regularly check for and install any available updates.
- Automatic Updates: I enabled automatic updates to ensure I’m always running the latest version. This helps in keeping my system optimized for Adobe software.
An up-to-date operating system not only improves security but also ensures better compatibility and performance for Adobe applications. The file formats you use in Adobe applications can impact memory usage. Efficient file formats mean less strain on memory. Here’s how I tackled this:
- Use Compressed Formats: Formats like JPEG or H.264 for video can be less memory-intensive compared to raw formats.
- Avoid Unnecessary Large Files: Opt for file sizes that match your project’s resolution requirements. Larger-than-needed files can consume
By ensuring my operating system was always up-to-date and using more efficient file formats in my Adobe projects, I noticed a marked improvement in performance and fewer memory errors. It’s a strategy that doesn’t just fix a problem but prevents it from happening in the first place.
6. Enable Disk Caching and Use Multiple Drives
Disk caching allows Adobe applications to store rendered frames and other frequently accessed data on the hard drive, reducing the need to re-render or reload information. Here’s my approach:
- Enable Disk Caching: In Adobe applications like After Effects, you can enable disk caching in the ‘Preferences’ menu.
- Allocate Sufficient Space: Make sure to allocate enough space for the disk cache. I found that a larger cache can significantly improve performance.
Disk caching can speed up your workflow by reducing the time Adobe applications spend on rendering and accessing data.
The Effect of Having Multiple Drives
Spreading your work across multiple drives can balance the load and improve performance. Here’s how:
- System Drive: Keep your operating system and Adobe applications on your primary (preferably SSD) drive.
- Project Drive: Use a secondary drive for storing ongoing project files.
- Cache Drive: Dedicate another drive for cache and scratch files. This can be a game-changer in terms of performance.
When I enabled disk caching and organized my files across multiple drives, I noticed a drastic reduction in memory-related errors and a smoother workflow. This approach allows each drive to handle specific tasks, preventing any single drive from becoming a bottleneck.
7. Regular Maintenance and Clean-Up
Regular maintenance and clean-up of your computer can significantly impact Adobe’s performance. Over time, computers accumulate unnecessary files and encounter system issues that can hamper performance.
Routine Clean-Up
I realized that regular clean-up sessions for my computer made a huge difference.
- Disk Clean-Up: Use built-in or third-party tools to clean temporary files, browser cache, and other unnecessary data.
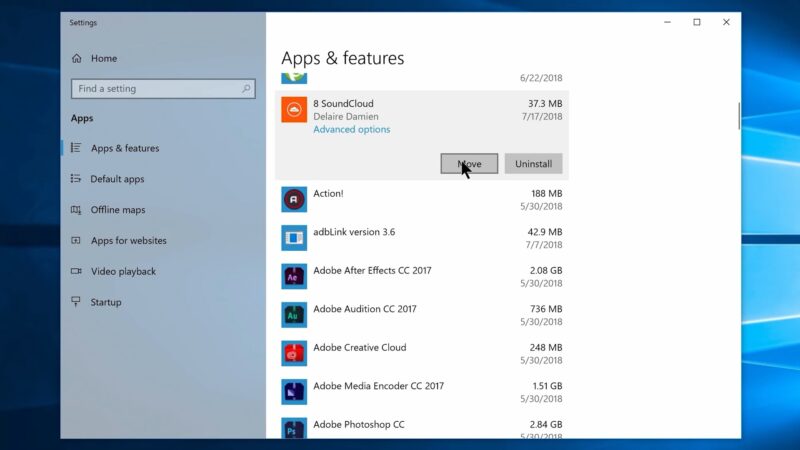
- Uninstall Unused Programs: Keeping your system lean by uninstalling programs you no longer use can free up resources.
- Manage Startup Programs: Reducing the number of programs that run at startup can significantly speed up your computer.
This routine maintenance helps in keeping your computer running efficiently, reducing the strain on Adobe applications.
Regular System Checks
Performing regular system checks can prevent many performance issues. Here’s my strategy:
- Run Antivirus Scans: Regularly scan your computer for malware, which can slow down your system.
- Check for Disk Errors: Use tools to check for and fix disk errors, ensuring your hard drive is in good health.
- Update Drivers: Keeping your hardware drivers updated can improve system stability and performance.
When I started regularly maintaining and cleaning up my computer, I saw a noticeable improvement in Adobe’s performance. These simple, yet effective, practices not only helped in reducing memory errors but also enhanced the overall speed and reliability of my computer.
8. Monitor and Adjust for Peak Performance
Actively monitoring your computer’s performance and making necessary adjustments can be a crucial step in resolving and preventing Adobe’s ‘Out of Memory’ errors.
System Monitoring
Regular monitoring of your system’s performance can help identify potential issues. Here’s what I focus on:
- Resource Usage: Keep an eye on your CPU, memory, and disk usage. Tools like Task Manager on Windows or Activity Monitor on Mac are invaluable.
- Identify Resource Hogs: Determine which applications or processes are consuming the most resources and address them accordingly.
By actively monitoring, you can make informed decisions about how to optimize your system for Adobe’s use.
Adjustments for Optimal Performance
Based on my monitoring, I make necessary adjustments to ensure peak performance. This includes:
- Balancing System Load: If certain applications are using too many resources, consider closing them or finding alternatives.
- Prioritizing Adobe Applications: Adjust your system settings to give priority to Adobe applications, especially when running intensive tasks.
Through active system monitoring and adjustments, I’ve managed to significantly reduce the frequency of memory errors. This proactive approach allows for a smoother workflow, letting me focus on creativity rather than technical issues.
FAQs
Why can’t I connect to Adobe?
This could be due to network issues, firewall settings, or outdated software. You can troubleshoot the problem by checking your internet connection, adjusting your firewall settings, or updating your Adobe software.
Can you repair the Adobe file?
You can try to open and repair the damaged file using Adobe Acrobat, Photoshop, or Illustrator, or use third-party tools or online services.
Can a corrupt file be fixed?
A corrupt file is a file that has been damaged or altered. Sometimes, a corrupt file can be fixed by using a file recovery software, a hex editor, or a command prompt, but not always.
How do I delete corrupted files?
You can delete corrupted files by using the Windows File Explorer or the Mac Finder, or by using a disk cleanup tool or a command prompt. You can select the files you want to delete and press the Delete key or drag them to the Trash or Recycle Bin.
Final Thoughts
By implementing these strategies, you can not only fix the ‘Adobe Out of Memory’ error but also ensure a seamless and efficient creative workflow. Say goodbye to interruptions and hello to a more productive creative journey.
We cover a wide range of software and share all sorts of reviews that can help you deal with various issues. For example, you can help you add and edit text in Premiere Pro with ease.